Getting Started with the Claude Code CLI
Intro goes here.
Starting Claude CLI
Simply type claude in your terminal to start the CLI.
To exit the CLI, type /exit.
❯ claude
 ▐▛███▜▌   Claude Code v2.1.141
▝▜█████▛▘  Opus Plan · Claude Pro
  ▘▘ ▝▝    ~/Developer/2026/gen_ai/master-claude-repo

───────────────────────────────────────────────────────────────────────────────
❯ /exit
───────────────────────────────────────────────────────────────────────────────
Setting the Project Folder
Just like your favorite IDE, Claude Code uses a main project folder that defines where Claude will be working. This project folder typically contains the following:
- Source Code
- Various project files used for installing dependencies and running development tasks
- CI/CD scripts, such as GitHub Actions workflows
README.mdfileCLAUDE.mdfile
The easiest way to set Claude's project folder is simply to start Claude from that folder:
shell
cd /path/to/my/project
claude
Setting The Status Line
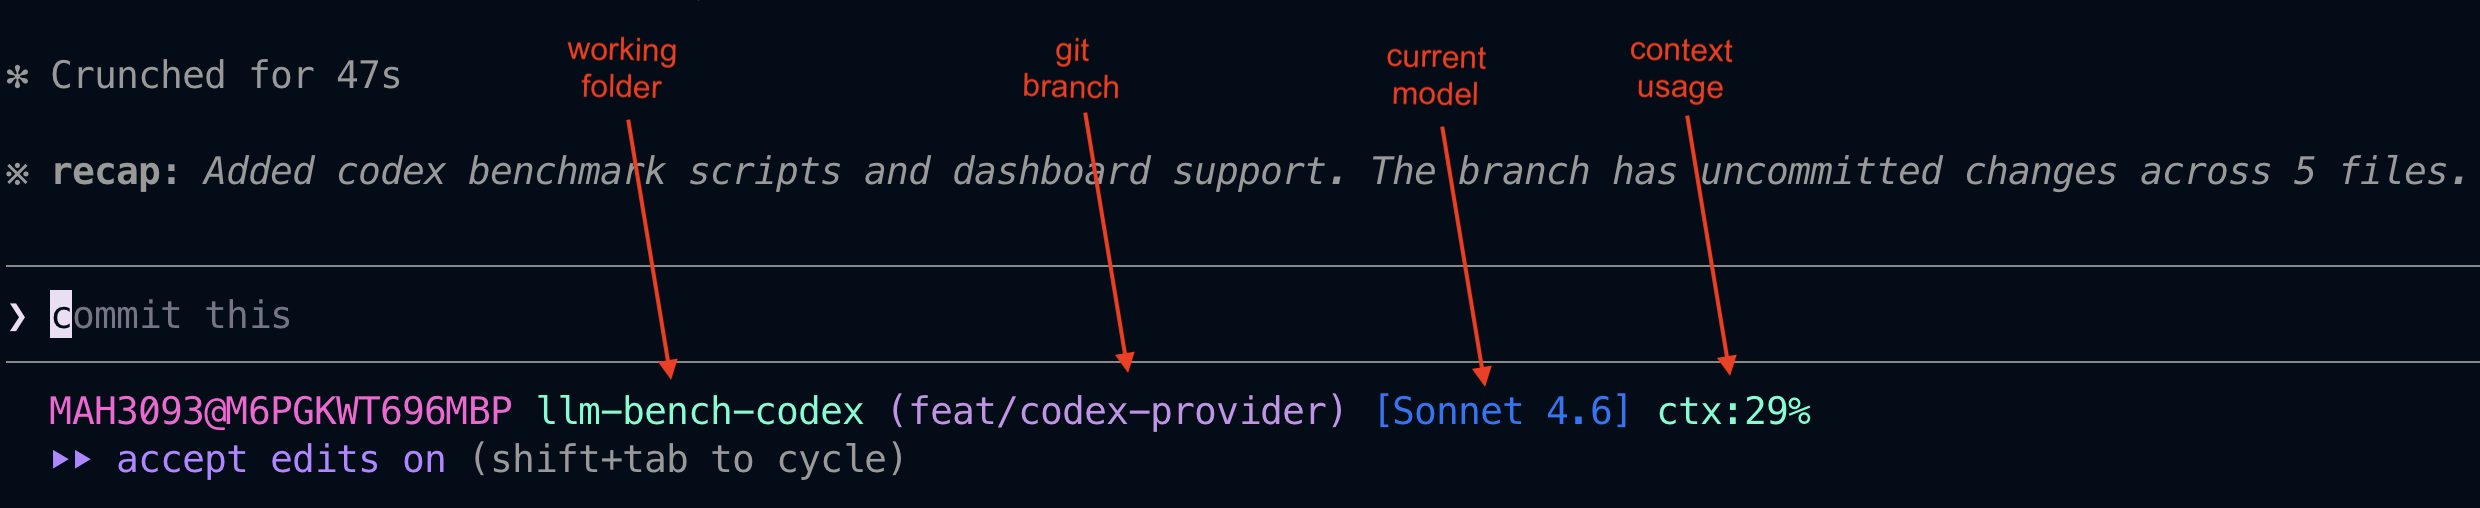
The Claude CLI has a status line at the bottom of the window, and this status line can be customized to show information relevant to your work.
Run the /statusline command to customize the status line at the bottom of the terminal. Claude may even scan your shell settings (i.e. your .zshrc file) and set the statusline to match what you have set for your shell prompt.
Example: